.png)

You may have a customized Numbered Page Navigation Widgets. In this tutorial we are providing you various types of page navigation. These can be inserted in your blog by following the steps given below.
Step 1: Go to Blogger Dashboard > Template > click on the Edit HTML button
Step 1: Go to Blogger Dashboard > Template > click on the Edit HTML button
Step 2: Click anywhere inside the code area and press the CTRL + F keys to open the Blogger search box. Then search for the following tag
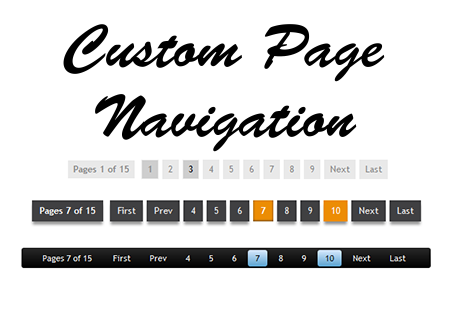
Step 3: Now choose one of the numbered page navigation styles given below and copy the code and paste it just above the code.
These are the following codes for page navigation widgets along with their designs:


Step 4: Now find (CTRL + F) this tag:
Step 5: Add the following script just above it:
After installing, you might want to change these default settings:
1) perPage: how many posts will be shown in each page (7). This value has to be the same as the number of posts on the main page. Otherwise, add the same number by going to "Settings" > "Formatting" and type it in the "Show at most" field, then click on the "Save Settings" button.
2) numPages: how many pages will be shown in the page navigation (6)
3) to replace the 'First', 'Last', "« Previous" and "Next »" texts, just type your own within the quotes.
Step 6: Click on the Save Template button and you're done.


0 comments